
All values will be masked with*. You can check show values to see the actual field values. It is implemented as a security measure.
If you face any problem during the registration process, you can Contact Marg dedicated helpline at 011-30969691 or ICICI Bank at (City Code) – 33446699 / (City Code) – 44456000 (e.g. 011-44456000) and press 5 in the IVR
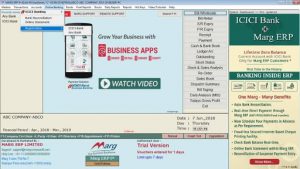
Step 1: Navigate to ‘Online Banking’ tab and select ‘ICICI Bank Registration’.
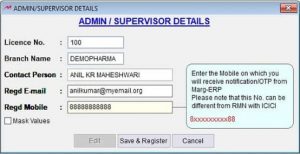
Step 2: Enter the admin details in the window appeared. The Mobile number and E-mail would be verified with OTP. This will be used later to send an OTP in case of any system change or security related transactions. This may or may not be the same email id and mobile number which you have used while registering with the bank.
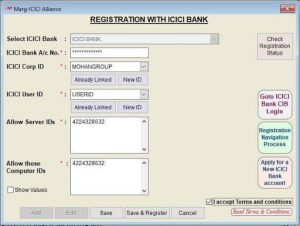
Click on ‘Add’ button to register a new bank account. Select the ICICI Bank account number you want to register from the given drop down. Account number will get automatically updated from the Bank account ledger. Only ICICI Bank accounts configured in Bank ledger will appear in the registration list.
In case you want to register a new account with the same Corp-ID/User-ID, you can use the already linked field to select the appropriate Corp-ID/User-ID and then click on Save.

Step 3: Enter your ICICI Bank Corporate internet banking CORPID/Client ID as provided by ICICI Bank.
Step 4: Enter your ICICI Bank Corporate internet banking USER ID as provided by ICICI Bank.
Note (you may recover the user ID/Corp ID by going to ICICI Bank CIB website)
Step 5: Only, the users who have the Server IDs will be permitted to initiate payments.
Step 6: Only, the users who have their Computer IDs will be permitted to initiate payments.
Step 7:
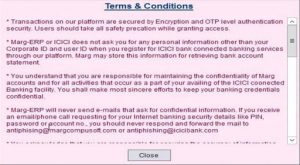
After you have verified all the details, you have to click ‘Agree to Terms and Conditions’ and click on ‘Save and Register’.
Step 8:
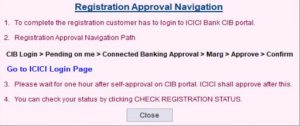
In order to complete the process, you have to login to your ICICI Bank internet banking website and navigate to pending on me > connected banking approval > Marg > Approve > confirm.
Step 9: After confirming, you have to wait for 1 hour to make payment, reconcile, check current balance, statement etc within Marg ERP. You can check your registration approval status by clicking on ‘Check Registration Status’ on top right-hand corner of registration window.
We will send you an E-mail/SMS once your registration is approved.
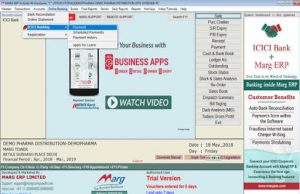
Step 1: Click on ‘Online Banking’ shown on the ribbon on the top of the screen.
Step 2: Select ‘Payment’ option from ‘ICICI Banking’
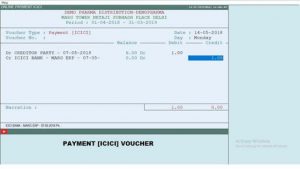
Step 3: After selecting ‘Payment’ option in the screen above, Marg Voucher will appear on your screen, where you have to select the ‘Date’ on which you want to initiate the payment.
- In case, you select Current date (Today’s Date), the payment will get initiated immediately
- In case, you select Future date ( Upcoming Dates), the payment will get scheduled for that particular date without any difficulty or delay.
Step 4: Select Name of Party to which you want to pay. The ledger balance will appear next to the party name. Enter Debit or Credit Entry. Then select the ‘Bank Name’ from the dropdown through which you want to pay.
- In case, you have multiple banks accounts, a pop-up will appear on your screen from which you can select the bank through which you want to make the payment.
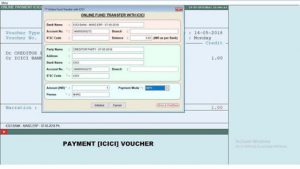
Step 5: After selection your Bank, an ‘Online Fund Transfer With ICICI’ window will appear.
- In the Top most section, you will see your bank details from which the payment will get initiated.
- In the second section, you will see your Payee bank details which are configured in your ledger. If you don’t have configured the details, it will ask you to configure the details.
*If you are logged in as an ‘Admin’ you can enter the details else not.
*You can also give powers operator wise with which you can change
Payment Mode: By default, IMPS is selected.
You can also choose NEFT/ RTGS/ Own to Own/ ICICI to ICICI.
- NEFT: Used for NEFT transfer up-to 2 lacs
- RTGS: Used for RTGS transfers above 2 lacs
- Own to Own: Used for Fund Transfer between own ICICI bank accounts.
- ICICI to ICICI: When you want to pay from your ICICI Bank account to your Client’s/Customer’s ICICI Bank account.
Step 6: Click on ‘Initialize’ after selecting your appropriate payment mode. After initializing the payment, you will receive an OTP on your registered mobile number which is given in Bank.
After entering the OTP, your payment will initiate and you will receive a reference number and you will go back to your ledger window.
*OTP is required for the first time payment only after that you don’t need OTP to make subsequent payments unless you take an exit from your Voucher window.
You Can check your bank account statement by using the Bank statement option.
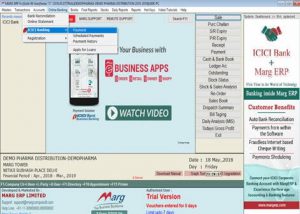
Step 1: Click on ‘ICICI Banking’ Payment option as shown in the image above
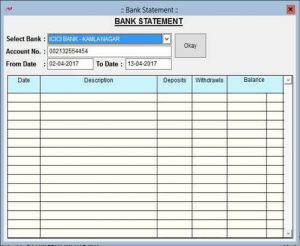
Step 2: A Bank Statement window will appear on your screen. Select Bank for which you want to check the statement from the dropdown shown in the image above.
Step 3: Enter the duration for which you want to get the statement and click ‘Okay’.
Note: Currently you can get the statement for 1 month only. We will increase the duration soon in our next update
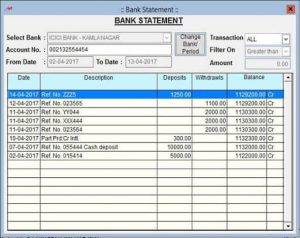
You will get the statement as shown in the image above.
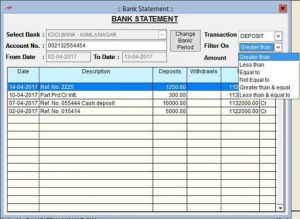
- You can ‘Filter’ the statement on the basis of amount by clicking on the ‘Filter On’ dropdown option.
- You can also search for transaction in statement on the basis of ‘Reference Number’ which you have received while making the payment or the ‘Cheque Number’ and it will appear on the screen.
- You can get the information of your current account balance by clicking on ‘Get Balance’.


