
Who Needs to Register in GST Portal?
The business that has exceeded 40 lacs turnover (10 lacs at NE and hill states) needs to register for GST. For certain businesses, GST is required no matter what turnover they have. If they run the business without GST, it will be an offense under GST, and they must pay huge penalties for the same. If you want to be sure about GST Registration, first you need to understand what is GST?
To help assesses, the government has launched a GST Portal named www.gst.gov.in. With this portal, the taxpayer can apply for GST, file GST returns, apply for GST refunds and even cancel GST registration.
GST portal has solved a big problem of businesses, one need not visit the tax department for any work. One can do all the works through one GST portal, whether to check notices or checking the status of the application, this portal communicates to business individually as a human.
This portal helps to mitigate bribes. An individual can freely file GST Returns. If you are new to GST Portal, learn about portal here. There are four important works of GST Portal.
- GST Registration
- File GST Return
- Apply for GST Refunds
- Cancel GST Registration
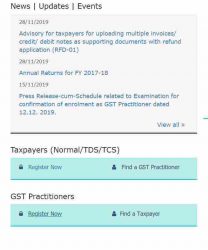
To register GST online at GST Portal, there are two options available. Either you can register as a taxpayer (Normal/TDS/TCS) or you can register as a GST Practitioner. GST practitioners are the middle man between taxpayers and government. Though the GST portal is easy to use, if someone faces issues while accessing the website, he can take the help of GST practitioners.
If you want to register GST online as normal GST taxpayer or GST practitioners, you should open the GST website www.gst.gov.in You will see this box on the left-hand side.
Register in GST Portal as a Normal Taxpayer
PART A
Step 1 – You should be having your PAN Card with you. Select your location, fill your name same as written at your PAN Card, put your PAN (Permanent Account Number), Email ID and Mobile Number. Make sure you have filled all the details correctly.
Step 2 – In the next step, you will get the OTP verification process. In this, you will get email OTP and mobile OTP, complete OTP verification.
Step 3 – After this, you will get TRN (Temporary Reference Number). You have successfully completed PART A of the registration process. This TRN number is valid for 15 days, copy this TRN.
You will see a button beside of New Registration called Temporary Reference Number (TRN)
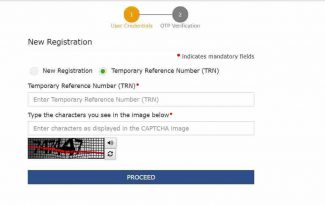
Step 4 – Fill your TRN and image CAPTCHA. Then you will get an OTP on your mobile and Email. Put your OTP and Proceed.
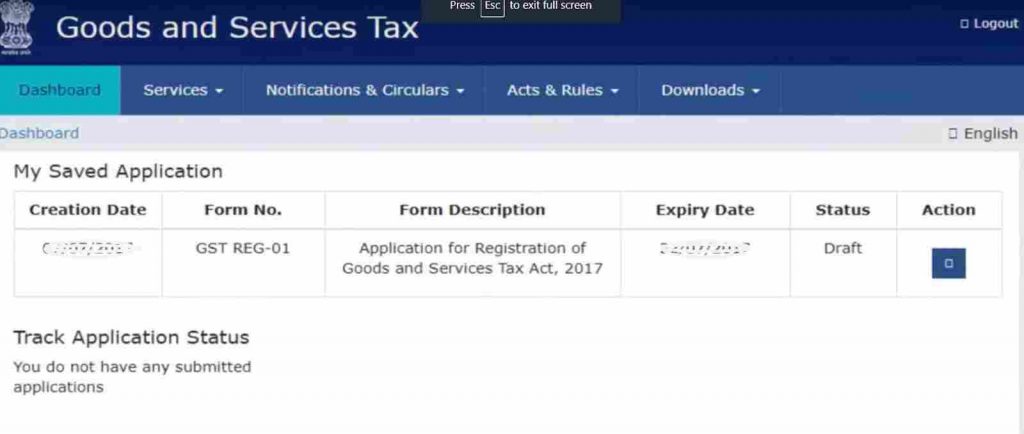
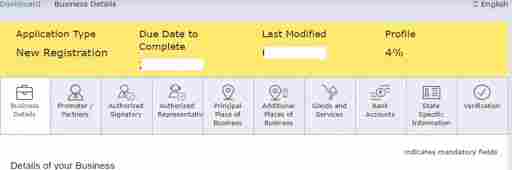
Step 5 – You will move to the Dashboard. You can see “My Saved Application” and below the details of the application. In the last column, you will see “Action”. Click on Action.
After then you will see this screen. Here fill all details.
PART B
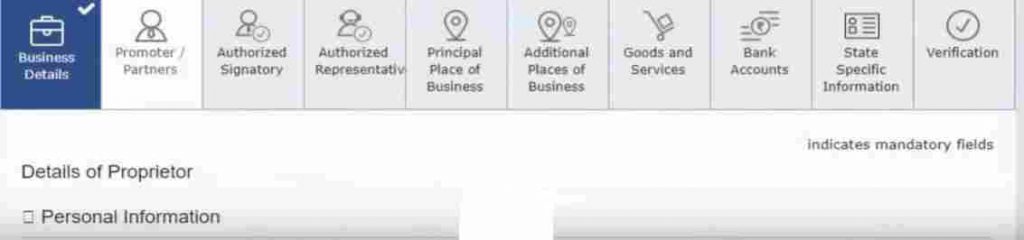
Fill Business Details
Step 6 – Fill all the details. At the “State Jurisdiction Ward”, select your ward. You must fill the Commissionerate Code, division code, and range code. You will see a link as “Center Jurisdiction”, click on the link and you will search all details.
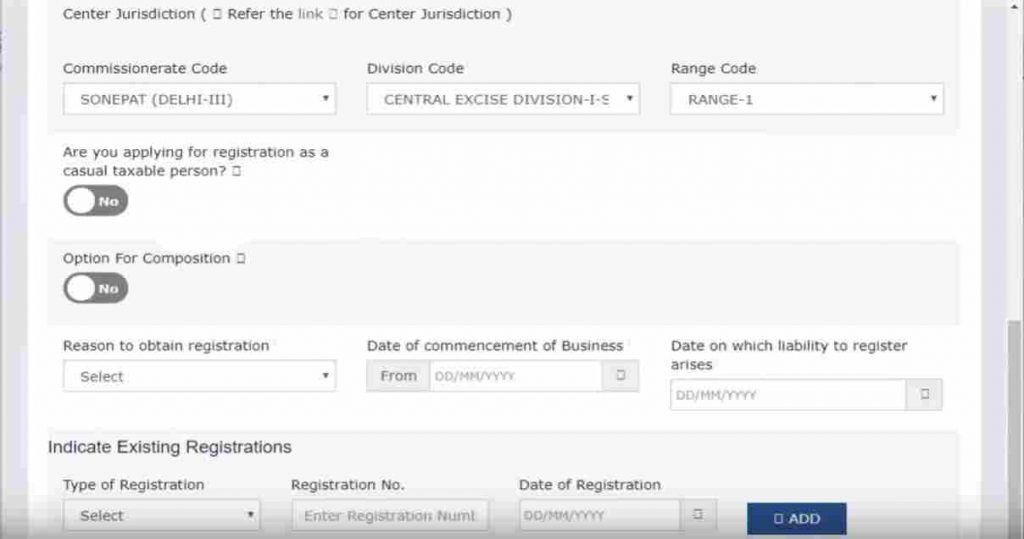
Here, you will be asked:
- Are you applying for registration as a casual taxable person?
- Option for composition
Use first switch, if you are registering for any business in which nature is not permanent.
Use second switch, if you are having turnover less than the limit to pay tax at a lower rate.
After filling all the details, check again and click on “Save and Continue”.
Fill Promoter/Partners
Step 7 – Here fill all the details, you will see image upload button. You can upload an image up to 100kb size. You will see a checkbox for authorized signatory. If you are registering as a partnership company, you can select the checkbox for making authorized signatory to your partner. Check all the details and “Save and Continue”.
Fill Authorized Signatory
Step 8 – Here, you have to set primary authorized signatory. Fill the details and check the box. If you select the primary authorized signatory which you filled in the last form, the details would be filled automatically. Patiently, check details, Save and Continue.
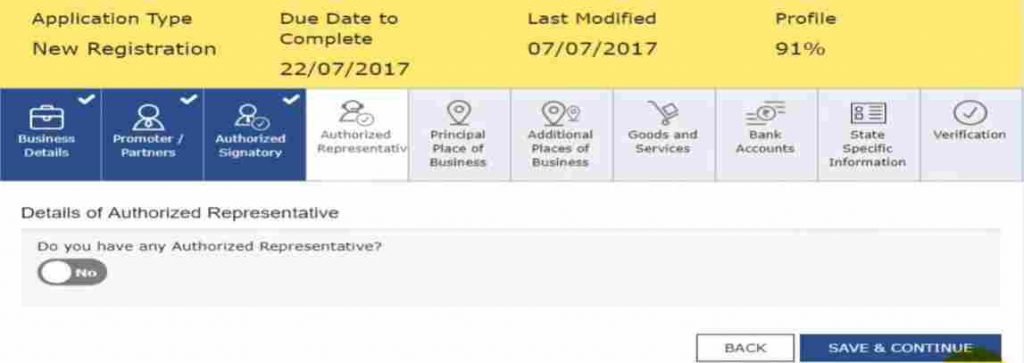
Fill Authorized Representative
Step 9 – If you want to make someone an Authorized representative, click yes and fill the details otherwise leave it blank and click on “Save and Continue”.
Now we have to fill the principal place of business
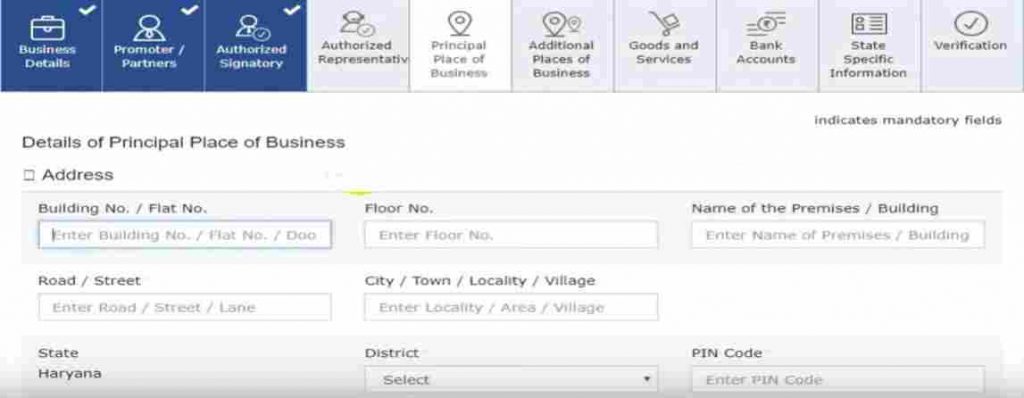
Fill “Principal Place of Business”
Step 10 – Here, you have to fill all the details of your address. Once you select “Nature of Possession of premises” then you have to upload the document for its verification. You can upload the document at a maximum of 1MB size.
Here, if you have an additional place of business then select the check-box at last otherwise “Save and Continue”
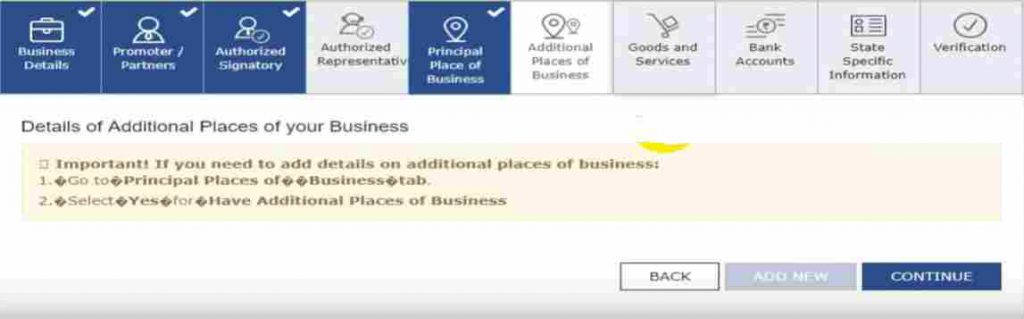
Additional Places of Business
Step 11 – If you have not selected an additional place of business simply click continue, otherwise click add new and fill all details.
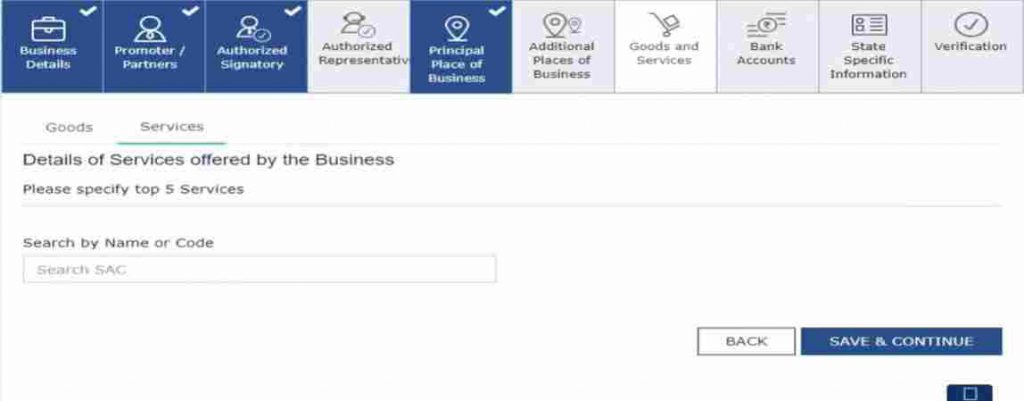
Fill Goods & Services
Step 12 – This part is very essential, here you have filled your goods or services details. If you supplying goods then select your categories, and if you are supplying services, select your services up to 5. Choose carefully, read it and when you write in the search box, it will find all categories related to your business and then you have to select.
Then “Save and Continue”
Fill the Bank Accounts
Step 13 – Fill the total number of accounts you are operating and fill details. You have to upload one document related to the bank either first page of passbook, bank statement or canceled cheque. The maximum file size is 1MB and then Save and continue.
After then, you have to fill state-specific information.
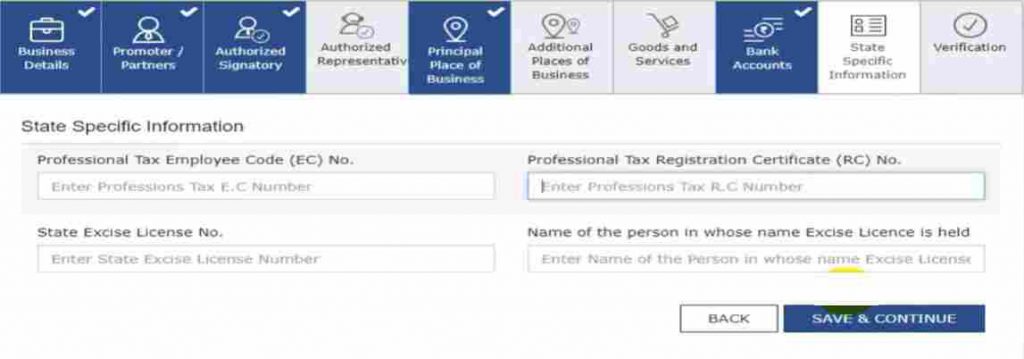
Fill State Specific Information
Step 14 – Here, you have to fill ED, RC, State Excise License No., and name of the person in whose name excise license is held. If you have these pieces of information, fill otherwise leave it and Save and Continue.
Go to the next verification option.
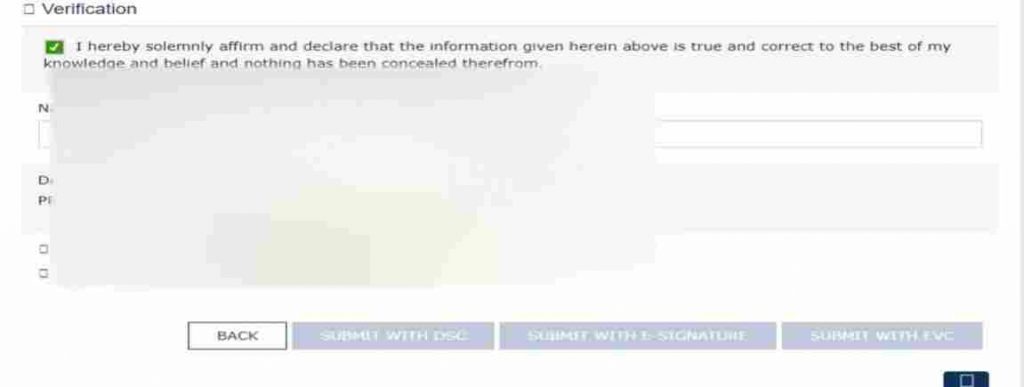
Step 15 – Here, you have to select your name, checkbox of verification. Before submission, check all the details on previously filled tabs and if everything is okay, then submit.
Here you will see 3 options of submission.
- Submit with DSC – if you have a digital signature, submit with DSC.
- Submit with E-Signature – if you want to submit with Aadhar mobile verification, click here.
- Submit with EVC – if you don’t have DSC or E-signature, click with EVC, here you will get OTP at your email and mobile number.
Here, you have completed the GST registration.


